🔗 Dependency System
The MakeIt3D plugin uses a dependency system that creates relationships between your Construct 3 objects and their 3D representations. Understanding this system is crucial for effectively managing 3D objects in your project.
📋 Overview
Instead of creating 3D objects directly, MakeIt3D uses placeholder objects from Construct 3 as references. This approach provides several advantages:
- Unified Management: All 3D objects are tied to familiar Construct 3 objects
- Multiple Instances: Create many 3D objects from a single placeholder
- Easy Identification: Clear naming system for object tracking
- Flexible Workflow: Use any Construct 3 object as a placeholder
🎯 How It Works
Placeholder Objects
A placeholder object can be:
- Any object from your MakeIt3D plugin
- Any existing Construct 3 object (Sprite, Text, etc.)
- An empty object specifically created for 3D references
Create dedicated empty objects as placeholders to keep your project organized and avoid confusion with gameplay objects.
Unique ID Generation
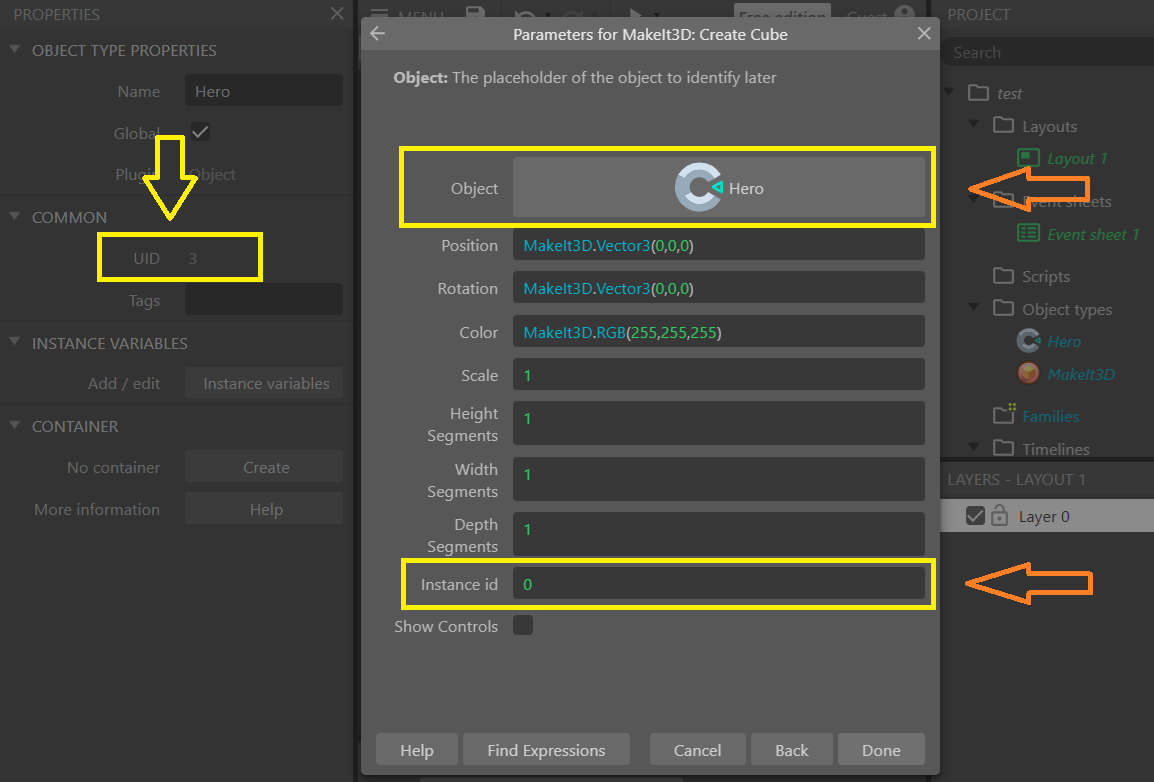
When you create a 3D object, MakeIt3D generates a unique identifier using this formula:
Unique ID = PlaceholderName + "_" + UID + "_" + InstanceID
Example: Hero_3_0
Hero= Placeholder object name3= Object's UID in Construct 30= Instance ID you provide
🔢 Understanding the Components
1. Placeholder Object Name
The name of your Construct 3 object that serves as the reference.

// If your placeholder object is named "Hero"
PlaceholderName = "Hero"
2. UID (Unique Identifier)
Every object in Construct 3 has a UID visible in the Properties panel.

Select your object → Check the Properties panel → Look for the UID value (usually a number like 2, 3, 5, etc.)
3. Instance ID
A number you provide when creating the 3D object to create multiple instances.
// Creating multiple instances of the same placeholder
InstanceID = 0  // First instance
InstanceID = 1  // Second instance
InstanceID = 2  // Third instance
🎮 Practical Examples
Creating Multiple Characters
Let's say you have a placeholder object named "Hero" with UID 3:
// Create different enemy instances
CreateObject("Hero", 0)  // Creates: Hero_3_0
CreateObject("Hero", 1)  // Creates: Hero_3_1
CreateObject("Hero", 2)  // Creates: Hero_3_2
Now you have three different 3D enemies, all based on the same placeholder!
Accessing Object Properties using expressions
To get the X position of a specific instance:
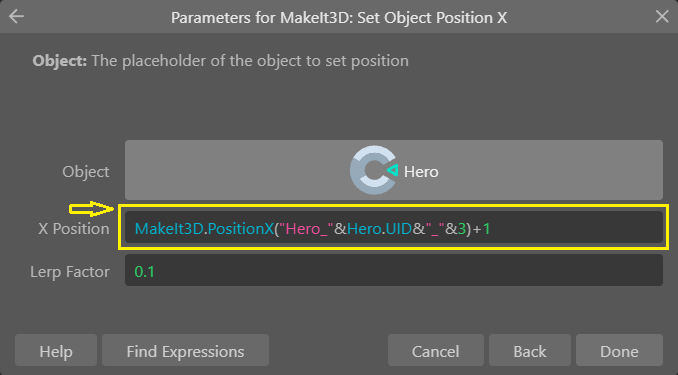
// Get position X of Enemy_5_1
var posX = MakeIt3D.PositionX("Enemy_5_1");

// Breaking it down:
// "Enemy" = placeholder name
// "5" = UID from Construct 3
// "1" = instance ID
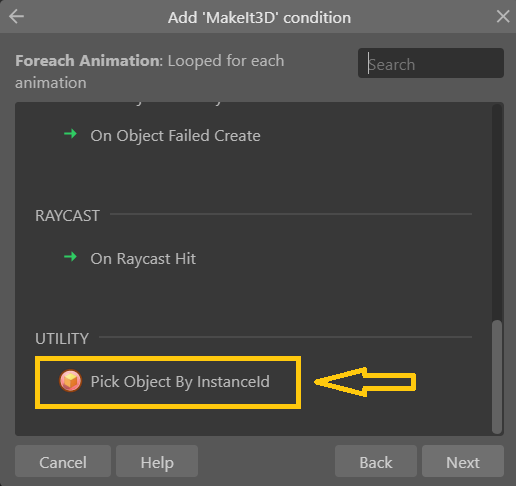
🎯 Using Conditions
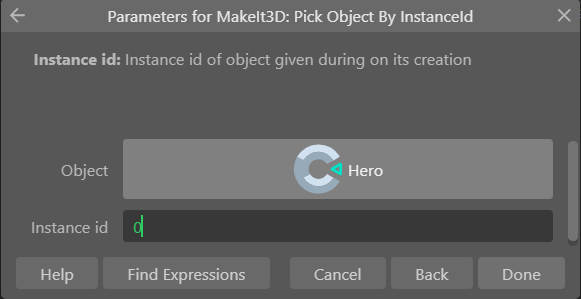
Pick Object By Instance ID
Use this condition to select a specific instance for actions:
- Action: Pick Object By Instance ID
- Parameters:
- Placeholder Object: Select your reference object
- Instance ID: Enter the instance number
// This selects Enemy_5_2 for subsequent actions
PickObjectByInstanceID(EnemyPlaceholder, 2)
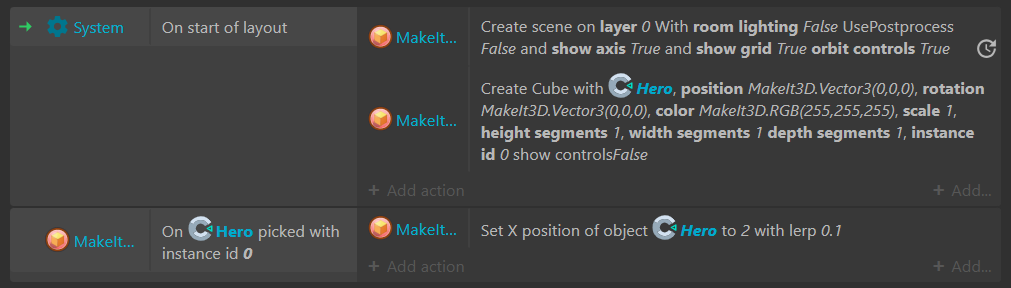 After picking, you can perform actions like:
- Change position
- Modify materials
- Update colors
- Transform the object
📝 Best Practices
1. Organized Naming
Use clear, descriptive names for placeholder objects:
✅ Good: "PlayerCharacter", "Enemy_Orc", "Pickup_Coin"
❌ Avoid: "Object1", "Temp", "Thing"
2. Instance ID Management
Keep track of your instance IDs:
// Use meaningful instance IDs
Player instances: 0
Enemy instances: 1-10
Pickups: 11-20
Environment: 21-30
3. Documentation
Document your placeholder objects and their purposes:
| Placeholder | UID | Purpose | Instance Range |
|---|---|---|---|
| Hero | 3 | Player character | 0 |
| Enemy_Goblin | 5 | Basic enemies | 1-5 |
| Coin | 7 | Collectibles | 10-20 |
⚠️ Common Issues
Issue: Object Not Found
Problem: MakeIt3D.PositionX("Hero_3_0") returns undefined
Solutions:
- ✅ Verify the placeholder object name matches exactly
- ✅ Check the UID in Properties panel
- ✅ Confirm the instance was created with ID
0 - ✅ Ensure the object exists before accessing properties
Issue: Wrong Object Selected
Problem: Actions affect the wrong 3D object
Solutions:
- ✅ Use "Pick Object By Instance ID" before actions
- ✅ Double-check your instance ID parameters
- ✅ Verify placeholder object reference is correct
🚀 Advanced Usage
Dynamic Instance Creation
// Create enemies in a loop
for (let i = 0; i < enemyCount; i++) {
    CreateObject("Enemy", i);
    // Each enemy gets ID: Enemy_5_0, Enemy_5_1, Enemy_5_2...
}
Conditional Object Management
// Pick and modify specific instances
if (playerLevel > 5) {
    PickObjectByInstanceID(BossPlaceholder, 0);
    // Modify boss properties
}
📊 Quick Reference
| Component | Description | Example |
|---|---|---|
| Unique ID Format | Name_UID_InstanceID | Hero_3_0 |
| Creating Objects | Specify placeholder + instance ID | CreateObject("Hero", 0) |
| Picking Objects | Use condition with placeholder + instance | PickObjectByInstanceID(Hero, 0) |
| Accessing Properties | Use full unique ID in expressions | MakeIt3D.PositionX("Hero_3_0") |
With this dependency system, you can efficiently manage complex 3D scenes while maintaining clear relationships between your Construct 3 logic and 3D objects.